Here you can find Solar Panels and technological accessories related to Solar Energy: Click Here If you want to learn about Solar...
Here you can find Solar Panels and technological accessories related to Solar Energy: Click Here
If you want to learn about Solar Panels, to advise you before buying or to build your own Solar Panel: Click Here
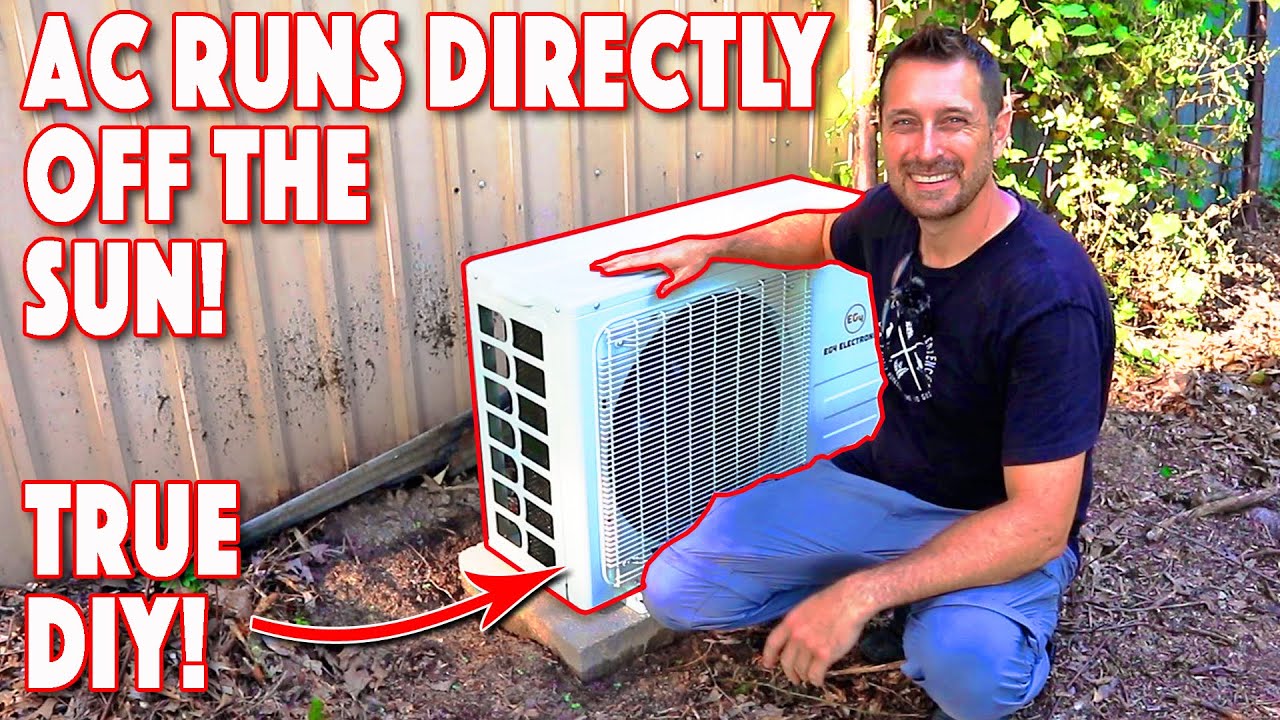
good afternoon Welcome to our Homestead I'm excited for this video today I have a great project for you and that is installing one of these eg4 plug-and cool mini split units the nice thing about these is that they are true DIY units they come with prevacuum lines that you can connect yourself and they run directly off of solar panels so directly off of DC power so if you are in an off-grid cabin somewhere and you are in desperate need of of some cool air this is the way to go for us out here in our barn where we want to do some special food storage we need something to cool this place down and we're quite a distance from our main array so the nice feature about this is running directly off those solar panels or it can also run off of AC power okay let's show you how to install [Music] it first step we are on the exterior of our barn and we are going to install the outdoor unit and we're going to do it on top of two solid concrete pad blocks right behind me that's how I've installed all of the Min splits on our house and it works perfectly we're going to Anchor it to those blocks with these sleeve anchors so I've got a masonry bit here and I've got a piece of tape on the depth that I want to drill I'm going to just Mark the holes and attach it to the blocks these aren't too terribly heavy so you shouldn't have a problem moving it into place if you're interested in getting one of these to cool off your cabin or your home I have a link for it in the description below the video and right next to it I have a coupon code for $50 off make sure you have everything level and that the unit is the proper distance away from the wall also make sure you have enough clearance on both sides of the unit okay y'all we're back inside and it's time to mount This indoor head unit now in order to do that we just need to take this bracket off the head unit itself and it just comes off with this one screw what we are going to do is choose the proper position on the wall get this level and then we are going to attach this to the wall just like this now for the head unit you need about 6 in on the top and 5 in clear on each side for this to have the proper ventilation and circul of air around it but this right here this circle is the most important piece this is where our refrigerant lines and drain line are going to go through the wall outside that's why I'm going to hang it first like this drill my holes where they need to be and then I'll take the cardboard back off the wall make sure that the bracket itself is aligned perfectly with a picture on the template and make sure the top of the bracket is perfectly level if it's not level you could have drainage issues with the condensate line what I'm going to do is put a screw right in the center of where our hole to the outside needs to be I'll back that screw back out the first bit I'm going to use is just a regular drill bit that is long enough to get through the entire wall then I can use my hole saw after that now make sure when you are drilling this to drill at a slightly downward angle to the outside that's extremely important for the condensate line to be able to drain properly on the way out you don't want anything draining back toward the interior head unit okay here's our next step these are the refrigerant lines on the head unit itself we need to gently Bend these out to a 90° Angle now they've got these Springs on them but still be extremely gentle with these when you're bending them out now you can see our condensate line is on one side but our refrigerant lines are on the other we need to take this condensate line off and switch it to the other side there's a little rubber plug right in here take that out and there is a little clip on the bottom of this uncp it and then push it on to the hose adapter on this side the next step is to stand this up on end open this front cover and then there's a little plastic panel right here remove this panel and that's going to expose the terminal block to connect our control and power wire too now it's going to be a challenge but you're going to have to feed this end through the back poke it up through the front and connect the numbers with the correct numbers on here and the ground with the correct ground there's one 2 three and your ground and that corresponds to the 1 two 3 and ground right here on the terminal block it's always good to have a magnet in this situation because if you lose this screw down below it's going to be a problem and you have to take the screw on the ground out because this has a full ring terminal on it unlike the other ones which are slip-ins before we hang our head unit on the wall and run all of our lines out of this hole we need to protect the hole I'm going to protect it with this schedule 40 PVC pipe that I can just put through the wall like this but I need to measure how thick the wall is and the reason we want to use a pipe like this going through the wall is because we have that condensate line if that line builds up any moisture on it you don't want that inside of your wall you want it protected now depending on what kind of structure you are in your outside cladding or siding may be different ours is a metal sided Barn so I may need what's called a boot on the outside of that to protect this let's get this measured and cut so I've run everything through the protective pipe already and snugged it up to the head unit what I need to do now is feed this power cord through first and then we'll get everything else run through make sure when you're doing this your condensate line stays on the bottom of the hole now I have this rotated right now but I will keep it in place as I rotate it and make sure that condensate line stays on the bottom now we're back outside at the outdoor unit and we need to connect the refrigerant lines we've got a 38 in line and a/4 in line those will match up to the 38 and4 in line on the outdoor unit and also the head unit but you need to buy one really important thing and that is this it's called nylog and it is four connections for refrigerant lines it is probably the best gasket and thread sealant out there and a friend of mine who owns an HVAC company told me use this and nothing else I'll put a link for it in the description below so now we're going to have to connect these together and you're going to have to straighten portions of this out but be extremely careful when you do that because if you put a kink in here or a Bend that's too sharp and it causes a leak then they are completely useless so so take your time and go slow we're going to match up our 3/8 in lines we're going to take off these caps we're going to be using two cresset wrenches and we are going to use our nylog on these threads make sure when you're doing this you do not get any dirt in this connection now this is something new I hadn't seen on the Mr Cool units they have these little cotter pins in here and you kind of put them through and and it locks everything in place it's really unique now you can wrap these up with the included extra pipe insulation and continue to wrap your lines together keep in mind though if you're going to use a line cover like this then it's going to be really a challenge to smash all of it down to a size that's going to fit inside one of these we've got our lines connected above now we're down here at the side of the unit we're going to remove both of these covers the bottom one is for the refrigerant lines and the top one is for the electrical and down here we have the same we've got a 3/8 in connection and a/4 in connection just connect them to the proper one it's really easy for the electrical connection we have our two mc4 connectors right here are positive and negative and we are going to be running in our power line that came in from the head unit through this bottom gland right here through this cable clamp and connected exactly how you did the the inside one so for us we're going to run this on DC power only and eventually we will connect in the AC line from the inside of the barn but I want to see how this does just running off the sun now obviously I'm not going to get any cooling at night but that's not that big of a deal for me right now so just like the inside we've got our ground which goes to the green screw over here our one two and three to the 1 two and three and then when we do run in our 15v uh AC line we've got a line and a neutral right here and then we'll also ground it so I got ahead of myself a few minutes ago and I wrapped that before I check the connections you always want to have some soapy water to spray on your connections to check them to see if there's any leaks before you wrap everything up now that I've done that I can rewrap these lines and then I'm going to use the ceiling clay or ceiling putty and I'm going to put it inside side of our pipe and kind of around the hole just to seal things up at the bottom of the outdoor unit where we've connected our lines there are these two caps one on each of the lines and this takes a 4mm allen wrench and what that does is that's going to release the refrigerant from inside of the outdoor unit into the lines and the head unit make sure you check everything down here with the soapy water also then when I put these brass caps back on I'm going to going to use nyog on these threads as well now we can let the refrigerant into the lines make sure there's no leaks and then we're going to connect the panels so I'm under our panels and it's time to connect these These are four solar ever 455 wat split cell mono perk panels my voltage open circuit is 49.3 one on each of these but remember you need to calculate for your cold temperature voltage so I think it's multiplying it by 1.1 and adding that to your voltage so mine are probably about 54 plus 54 1/2 the max voltage on the eg4 12K Mini Split unit is 380 volts so I am well under that I'll probably add two more panels to this entire system in the future but for now right over 200 volts should be perfect but for now let's get these wired up you're going to need a PV disconnect switch for this project I mounted mine right here under these panels and I am using an IMO brand these are made in Austria again as always I'll have this and my panels linked below the video between the panels and and my disconnect switch I'm going to put an inline fuse on the positive red wire I don't have a combiner box since this is just a single string and the directions recommend running these just in series to the unit it's still a little sunny out right now so I'm not going to connect this directly to the panel get your length of your PV wire correct and then we'll connect it after dark actually since I have the PV switch installed now I can make my connections on the panels because it is disconnected here and since this is a temporary structure we're just going to leave our wire here I've got extra wire but I will be doing more wire management later things aren't perfectly buttoned up yet but we will wait until we are sure that everything works properly before doing that it might not look like it on camera but the sun is almost down so I'm not going to get any production out of these panels tonight I'll see you in a second good morning and welcome back it's a partly cloudy day out today so we've periods of sun coming on and off of the panels I think that'll give the eg4 mini split a really good test to see how it Cycles on and off with just DC power okay here we go let's see if there's enough sun outside right at the moment we've got power so that's fantastic we're down at 22° C now I haven't figured out how to switch this to Fahrenheit if you can at all I couldn't find anything in the instruction booklet on how to do that I think 23° C is about 75° F so we're going to keep it we're going to go down as low as we possibly can actually it says in the instruction manual to give it a 5-minute cooling test at the lowest and that's 16 so that's I'm guessing that's probably about 55° maybe 60 now you should run a heating test at the same time and crank it as high as it can go put it on heat and run that for 5 minutes as well so the question is is if there isn't enough sunlight will this just completely shut down or will it keep the fan going like this but shut down the compressor which obvious obviously draws more amperage will that fan constantly run with very low voltage on the panels and everything else shut down I'm just not quite sure just like with most Mini Splits they are very quiet that's on full blast and I can barely hear the fan which is awesome now I've got to get to work insulating the garage door in this Barn because it is the only thing that is not insulated okay I just confirmed my own question when that green light comes on next to the temperature reading that means you've got enough Sun for the compressor to kick on essentially it was blowing out semic cool air and I thought it was cold enough but now once that kicked on it's super cold so it's working perfectly and that indicates whether you've got enough sunlight to be able to power the compressor in there okay now there's one thing I dislike about this and that is the manual it's devoid of a lot of information it's very small very thin compared to something like a Mr Cool unit it has a very thick full-sized book that you get and it covers absolutely everything this does not so if you've installed Mini Splits before you're going to know what to do when you run into issues but with this you're not going to find any answers I really challenge eg4 to rewrite the manual and put all of the information in it well that's it friends if you have any questions for me please leave them for me in the comment section below now go check out these videos right here which is our entire playlist of over 50 videos on our solar installs here on our Homestead have a beautiful blessed day and we'll see you next time bye [Music] ...


No hay comentarios