Here you can find Solar Panels and technological accessories related to Solar Energy: Click Here If you want to learn about Solar...
Here you can find Solar Panels and technological accessories related to Solar Energy: Click Here
If you want to learn about Solar Panels, to advise you before buying or to build your own Solar Panel: Click Here
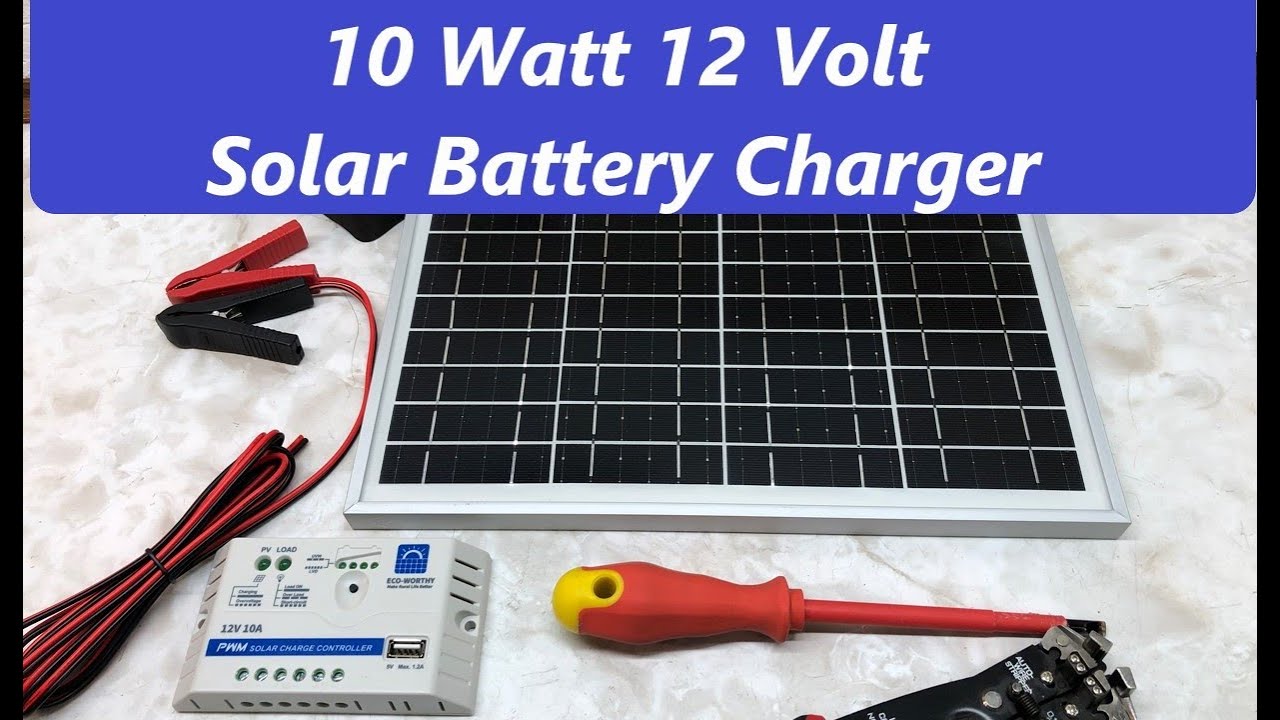
good afternoon today's project is hooking up the eco-worthy 10 watt solar panel car charger battery charger to a battery and then testing it to see how well it's working the connections are really quite simple you've got this controller 12 volt 10 amp controller but you need to connect to the solar panel with the wires on the back of the solar panel and then you've got these alligator clips that go to the battery that you can need to connect to the controller as well 12 volt charging kit comes with a decent amount of wire depending on your application you may need to add some wire to it they also recommend adding an inline fuse on the power the red wire that goes to your battery why they didn't include that I'm not sure but for our testing today I'm not going to put the fuse in just yet I might do that later what I want to do is I just want to get this hooked up and I want to prove that it is charging the battery so we'll get a reading on the battery before we start and then we'll get a reading on the battery maybe half an hour later we'll see what it's doing I can get a reading on it right away too to see if the charger is doing anything so first thing we're going to need to strip some of this wire off [Music] just enough wire stripped so that you can stick it into the connector [Music] it's probably enough on the controller we're going to loosen up the first four screws because the first two are for the solar panel positive and negative the next two positive negative for the battery just take a small screwdriver loosen those screws up then take that wire that you just stripped and stick the red into the red and the black into the negative that was the second set of screws right here this is just plastic so you don't have to go crazy tightening this just want it snug so that the wires can't be pulled out and then we also need to wire in the solar panel solar panel has already been stripped so we'll just tighten up the wires a little bit so then with the connections made to the alligator clips first then you can connect the solar panel you want it connected to the battery before you connect the solar panel to the controller so I'm going to connect the alligator clips to the battery and you can see then it shows that I have load and now we'll connect the wires for the solar panel to the controller thread goes Positive Black goes to negative you can see it's already making a connection it has the solar panel light on just want them snug and at this point we should be charging this battery I checked the battery this morning and it was at 12.4 volts let's see where it's at now 12.42 currently that's what it's sitting inside so what we'll do next is we'll take this outside put it into the Sun and check it again so we have the solar panel outside in the sun currently January in the Upper Midwest in the United States sun is very low but it seems to be getting good Sun the controller is hooked up I have both the PV and the load lights on we are connected to the battery and currently battery showing 12.69 and inside it was at 12.4 12.41 or 2. so outside we're already at 12.68 I'm gonna let this go for a little while and see what happens one additional thing you need to do with the controller is determine the type of battery you have connected so I've got a lead acid it's a flooded automotive type battery you press the the on off button for five seconds until the LEDs Flash and then once they're flashing continue to press the button until you have three LEDs for the flooded battery which is what I've got you can see three LEDs are flashing the instructions show what the other settings are for different like gel type battery for example and then one minor adjustment I want to do online is well technically it is a flooded battery it is also sealed I don't have the ability to open it up and add anything to it so I'm going to change this to sealed type battery which is the first led blinking and we are probably half an hour in and you can see that the battery is going anywhere from 13.4 right now it's dropping some I guess is that it's trying to do a float here where the battery is charged all right I'm back final thoughts the sun has gone down I brought everything back inside the battery is at about 12.8 fully charged let's take a look 12 point seven three so I would say that's pretty close to fully charged I did notice that when it became fully charged the controller would stop charging and the voltage would drop so it's doing a nice job with the trickle charge and not overcharging the instructions mentioned to put in a fuse and since there's only so much wire that comes with this you may want to add more wire as well as the fuse so that you can run this for whatever your particular Arrangement is you can have the solar panel panel further away from the battery instructions also mentioned that you're supposed to connect the battery to the controller first before you connect the solar panel and I think the reason for that is is that if the solar panel was receiving a charge and there was nothing connected to it you could damage the controller but since there isn't anything on here that would easily let you disconnect the solar panel it's not easy you'd have to undo the screws and pull the solar panel off every time I think that if you were to just cover this up and prevent it from getting any charge you'd be okay so I recommend keeping the box that's what I did right now you can even see sitting here in the garage it's getting a charge from the solar panel because of the light on that's above it if you put the solar panel back inside the Box isn't a bad idea to keep the Box for protection when you're not using it comes with these little foam pads you can see now that the solar panel light has gone off that would be the same I think as disconnecting the solar panel from the controller because at that point I am not providing any power into the controller and at this point if I disconnect the battery it's totally disconnected so you want to be careful then that when you store this it's not getting any light overall nice little product seems to do what I wanted to do easy enough to wire I like the fact that this is a trickle charger and protects the battery and won't overcharge also you can set it to a number of different battery types that's kind of Handy it does show the battery charge status so nice little product thanks for watching good luck with your install if you like the content that you're seeing here please like And subscribe thank you foreign [Music] ...


No hay comentarios