Here you can find Solar Panels and technological accessories related to Solar Energy: Click Here If you want to learn about Solar...
Here you can find Solar Panels and technological accessories related to Solar Energy: Click Here
If you want to learn about Solar Panels, to advise you before buying or to build your own Solar Panel: Click Here
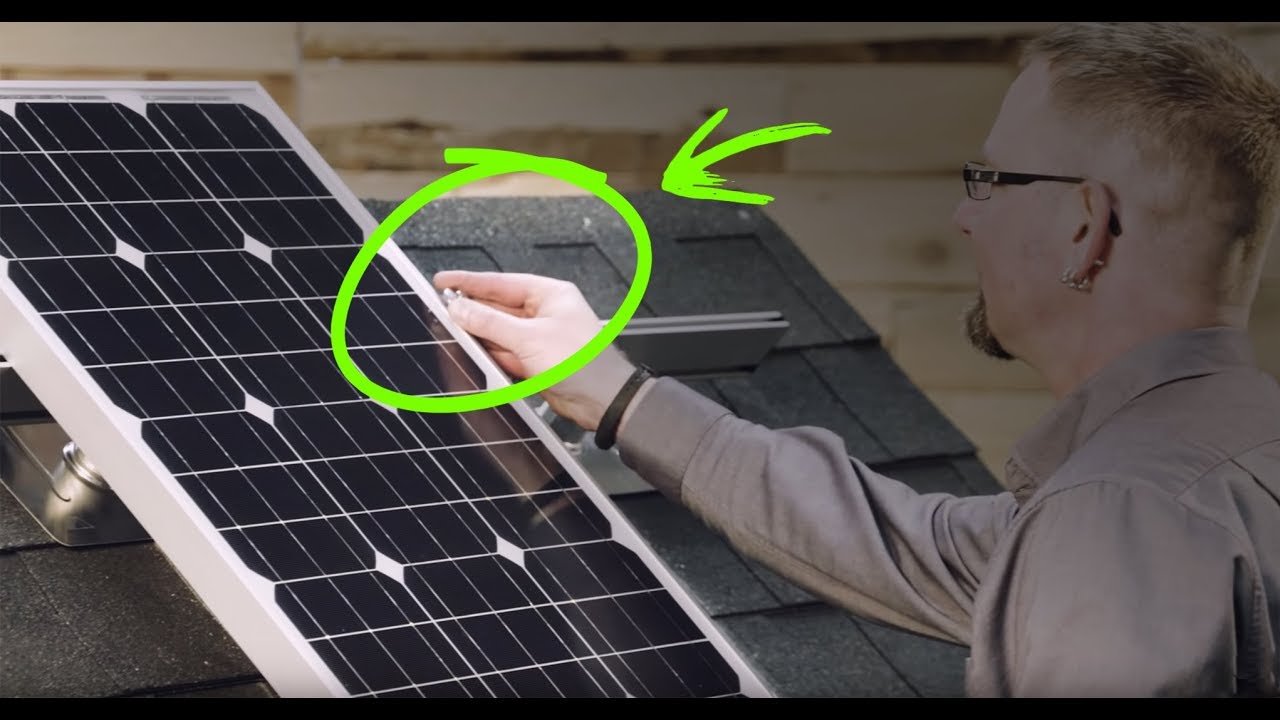
Hello, solar folks! My name is Jeremy Allen, solar design tech here at Wholesale Solar. Today we're here to discuss one of the most important parts of your solar array, the solar racking system. We're gonna go over the installation of the IronRidge XR100 racking system on an asphalt composition roof using the FlashFoot 2 flashings. There are many other types of roof this is the most common, but if you have a tile or metal roof don't be afraid, we do have a solution for you. We choose to work with the IronRidge racking system because of its ease of installation, code compliancy, and included state-stamped engineering that will include your wind and snow load requirements specific to your state. Before we jump on the roof, be sure to have all of your tools prepared, your parts laid out, and the engineering report that we've provided you with so that you know how to lay out the panels on the rooftop. I do wanna make sure each one of you is being safe up there. You can get a fall protection kit from your local hardware store or roofing supply store to make sure you're extra safe. With that said, let's get started. One of the pieces of information that is not included on your engineering report is the distance between the rails up on the roof. That's gonna be dictated by the holes that are pre-drilled on your specific panel. In this case, we've got a solar panel here, about 100 watts, its holes are gonna be 35 and a half inches apart. That means the rails on the roof are gonna be 35 and a half inches apart. To get started, we need to find out where our rafter or truss is within this rooftop. Now, keep in mind some local Authority Having Jurisdiction or your local building department, may require you to have full three feet or more from the edge of the roof. In our case, we don't have that much roof, so we're gonna go right up to the edge of it. Where we're gonna wanna start out is finding nails if we can in the facia, or on that nice pretty board that goes along the bottom of your rooftop. In this case we can see a couple nails and we know generally that that truss is gonna be located somewhere in this area. We don't need to know that exact space yet, because we're gonna drill a spot hole through the roof and into the attic so we can measure exactly where that is. The other figure we wanna keep in mind is the 35 and a half inches that we discussed earlier, in this case we'll see, doesn't line up exactly with the center of our shingles, which we'd really like to. And as long as we're within two to three inches of those pre-drilled mounting holes on the back of the solar panel, we're okay. So we're gonna know, we're gonna go in the center of this shingle length right here, and the center of this shingle length right here. So first thing we're gonna wanna do, we're gonna wanna get our drill and we're gonna wanna drill right close to this to see how close we actually are to that rafter. Alright, so the first thing we're gonna do is we're gonna put a pilot hole in here. And again, we found our truss location somewhere in here and we know we've gotta be somewhat centered on this course of shingles so we're gonna go ahead and put a hole right here and see where we come out in the attic. Now we can leave the drill bit in place so that we can go into the attic and find out where we are in comparison to that truss. At this point we're gonna come into the attic space and measure from the center of our drill bit to the edge of our truss to find out exactly how far we have to move over. And we see we've got about one and five eighths inches. We've gotta another three quarters of an inch to that to be sure we're centered inside of the truss. So let's go ahead and go back up on the roof and make that happen. Alright so we know we're an inch and five eighths from the center of this drill bit to the edge of the truss here so we're actually gonna mark out that exact measurement. And know we've got the edge of our truss. Now, from there because all of our standard lumber is gonna be about an inch and a half, we wanna measure three quarters of an inch from that point to the center of what's now gonna be our new hole. Now you're asking, "You've got a hole in your roof! What are you gonna do about that!?" We actually will just use a standard sealant, something like Henry's or whatever your roof specific manufacturer requires and put it into this hole to make sure it stays water tight and essentially, that flashing is gonna go over that hole to make sure it stays weather-proof and water tight anyway. So from this step, we'll go ahead and remove our drill bit. So now that we have our center mark here, we're gonna make another center mark for the next one up, again 35 and a half inches from the bottom hole. So we're gonna go ahead and measure, in this case we know we've got a good square structure, may not always be that way, so there may be a couple trips into the attic to spot holes to be sure you're hitting the center of your truss. But in this case, we'll go ahead and move along and we'll find out we're about 27 and three eighths of an inch from the edge of the roof. Now I'm gonna take that same measurement up to this course of shingles we're gonna go 27 and three eighths inches up here and know we've got a line now that we can take with our chalk and make a good visible line for future holes that we're gonna be drilling. Now if you have multiple panels high or multiple panels wide, you'll just do this that many more times to be sure you have all the holes lined up before you actually start drilling. So we've got a good chalk block and we're actually gonna get in here, we're gonna chalk out a line on here so everyone can see exactly where we're gonna be drilling. And pretty simple now from here, again, as long as the framing's standard, you should have about a 24 inch center-to-center line. Your truss is typically your 24 inches from each other, but again, that's not gonna always be the case so you'll wanna double check. We're gonna go ahead and pull the tape measurer 24 inches over and know that should be the next truss. So now we have our two trusses marked out where we're actually gonna be drilling into the roof. The other thing that we need to do is actually get that line lined up here where our rails are actually going to be sitting. So we're gonna take a measurement from the bottom of the roof to the center of this or if you really trust your roofer and know that they made straight lines to begin with, a lot of times you can follow their course of shingles and know you should be really close. So if we did that right, we'll know these'll be our first few real holes that will hold the flashings in place. So we're gonna go ahead and drill in. Now that we have all of our holes drilled, we're gonna get up underneath each course of shingles to make sure that our flashing has a good place to slide up and seat itself. So we're gonna take our flat bar and we're gonna slide it up under here and look for any resistance where there might be actually nails popping up and we're going to try and remove them. Sometimes you're gonna get lucky, which, in this case it looks like we may have with this flashing, where there's not gonna be any nails that would obstruct that flashing. Other places, you might find out there's gonna be a couple nails and you're gonna have to remove those and possibly replace them if need be to keep those shingles in place. Before we put the flashing in place, we are gonna put the appropriate sealant in the holes to make sure our roof remains water tight. In this case, we've got some good old Henry's, we're gonna fill that hole up completely, knowing that the flashing's still gonna cover this hole and keep it even further weather tight. Get a good amount in there, make sure it's good coverage, and if you need to, go through on the other side into the attic to make sure that did fill that hole completely. Now we're gonna go ahead and put our flashing in place, lag it down into the hole that we drilled already, and go from there. We're gonna slide this flashing up under that course of shingles, knowing we don't have any nails up there. These center lines, there's actually little punches in the flashing to line you up. If you've got a chalk line going the length of your roof, which you will in longer solar arrays, you can line up these little notches right with those chalk lines and it'll center you right to where that hole should be. Now in this case, we know we're close to that hole and we're gonna go ahead and start threading our bolt in place make sure that we don't have anything in that hole. You can use an air compressor to clean out the hole if you need to. And then, just a basic ratchet and we're gonna tighten that guy up until it starts to seat all the way to the roof. Now, we don't wanna over-tighten to where it's concaving that flashing, you can actually cause issues in doing so. And again, we don't wanna get too tight we just wanna seat firmly against the rooftop. And you'll feel it. I don't recommend doing this with a power tool because you will over-tighten them and you can ruin the flashings or break the bolt just from the excess heat going into the truss. And so we're fully seated there, we actually have a cap that's now gonna go on the top of this that's gonna connect it to the rail that we're putting in place. This is the proprietary piece that IronRidge has come up with to make their flashings this easy to install. As you see, the bolt is raised off of the roof surface so that if water does come through here, even without this cap being on there there's no way of that water actually getting down into the rooftop. So we take this piece here, and it's gonna go in place and it can have two different locations: it's either gonna be up and down that like that, which we actually don't want that, we want to go back one quarter of a turn and lock it so that the rail will sit right across it like this. Alright, our last little guy here and we're ready to move onto the rail install. Alright, so the next portion of this installation is gonna be the actual rails being attached to these flashings. Each setup's gonna have some different amounts of hardware that we're gonna have to look at before we put the rail in place. In this case, we've got it simple, because we only have two attachments from the rail to the flashings. And we're gonna use the supplied hardware that's actually gonna be a square on one end and a regular nut on the other end. That square end's gonna slide down the rail channel all the way to the one side, we'll get both of those in there, so we have them in place. And we can even line them up, close to where the flashings are if you've got the rails sitting on the rooftop like this. In a lot of cases, I am gonna suggest to get that rail ready ahead of time down on the ground if possible. In this case, we'll loosen up these nuts enough to where they slide right over these flashings. So in this case, we're actually gonna mount this rail with the non-hardware side facing down towards the ground so that you don't see any of that hardware if you're looking up at the array. So we're gonna spin it around, we're gonna line it up with those flashings and we're gonna drop it right down over the top of these. We're gonna keep it loose for now, just hand tight, until we get the other rail in place to make sure that they actually line up. We're gonna wanna measure from a common point on the roof, in this case the edge of the roof, to make sure that these rails are flush. In a lot of cases, you could actually cut the rails up on the roof, however I don't suggest doing that just because of the metal shards that you'll have all over your rooftop and because you could damage the panels if there already mounted on top of these rails. So we're gonna go ahead and measure, and then we'll tighten everything down. And then we'll hand-tighten as we go through, making sure that the elevation of the rail is where you want it to be. Now, some rooftops aren't completely flat, so because of that, IronRidge's flashings do have an elevation adjustment so that you can make sure that rail itself does remain flat and consistent through the whole array. Now, there are gonna be torque specs on each one of these. If you are using a torque wrench make sure that you are using a very high quality torque wrench. If you over-torque these bolts, they will break. Alright, so now we have our basic rail installation in place. Now's it time to actually dress these rails with the appropriate wire management and install any microinverters or optimizers that we may have as part of the system. First thing we're gonna do is install these end caps. IronRidge provides these end caps for their rails to be sure that no bees or bugs or anything gets inside of the rails and it's also a good way to make everything look pretty good. So we're just gonna snap these in place. This is assuming that your rails are cut to length, which like I said before, you should have them cut to length before getting them up on the roof. It's always good to double check because once you do cut, you can't go back. Now that we have those end caps in place, we'll place some wire management clips on the top rail or on the rail that's gonna be closest to where your wires are gonna be located either for the PV modules themselves or for possible optimizers or microinverters that could be part of the installation. So typically you're gonna get three of these clips per module, and you'll want to just slide them right on top of the rail, close to where they may be. They're fully adjustable so once we get the solar panels up here and ready to install, we'll adjust them accordingly to make sure they're in the correct place. So one of the most important parts of getting the whole rail system prepared is making sure we're properly grounded. Now the IronRidge system makes this grounding method very simple by adding one ground bolt to each solar array. Now this one ground bolt attaches to your bare copper wire, goes down to your ground rod that's already existing, and this one ground lug is actually gonna go through the whole system because their whole rail system is integrated. Which means each piece and part has little teeth on it that bonds everything together to be sure you don't have to individually ground each PV module. So this little guy right here, we're gonna go ahead and install on either rail, whatever's closest to your grounding mechanism, that'd what we're gonna use. In this case, we're gonna set it on top of the rail just for ease of installation and so that you can see what we're actually doing. Now on your individual installation, you may choose to actually hide this up underneath the solar panel. That's not a problem, as long as it's properly grounded, you'll be safe. Part of dressing our rails is gonna be installing any microinverters or solar optimizers that we may have as part of our installation. These guys in this case, this is a SolarEdge power optimizer, which will come included with all of our SolarEdge systems. This will be attached on each solar panel and then attached to each other, then down to the inverter to carry the DC current. So what we're gonna do, is we're gonna try and center this right underneath where that solar panel's gonna sit so that everything has easy access to plug into each other. So again, we have a simple piece of hardware, just a T bolt with a nut, and again, same grounding mechanism built into it with the little teeth that are gonna bond this unit to the rail. Now these are a T bolt so you will wanna make sure that they are positively seated inside this channel, and that the T is turned completely. You'll know that that T is turned correctly by the little hash mark in the top of that bolt being opposite of the rail itself. So in this case, we're going up and down with that little hash mark where our rail is going side to side. So in this case we have our optimizer put in place right where we're gonna want it underneath that solar panel. And we can use the wire management that we have in place to set the cables up underneath here, and they clip, so they hold it. Now we know that we're gonna do some adjusting with our wires, and in this case actually not have an optimizer for our system, but I did wanna show you what all was entailed with that installation and how you would appropriately use this wire management system. What we have here is the UFO system by IronRidge. This is a mid clamp which will actually be used throughout the whole system, and with the addition of the stopper sleeve this will turn into an end clamp. We'll just simply push the two pieces together, snap them together, and that now is an end clamp that will hold the end of the panels in the array together. Whereas the single piece by itself will separate the panels in the center. Now we're gonna move onto the actual installation of the solar panel using the IronRidge UFO clamps. We'll have these end clamps on the end of the rail, we'll have the mid clamps between the solar panels that we're actually installing. I generally recommend that you have a few hands doing this at least. You will be dealing with a 50 to 60 pound solar panel, and they're not very easy to hold in place while you're bolting. In this case, we've got a really lightweight solar panel for this project just to make it really easy. I'll go ahead and lay this solar panel down. We're gonna make sure that we're going over the top of our wire management and in the case that we do have an optimizer or a microinverter, we wanna make sure that we're not pinching it in any way. That this panel is sitting flush down on the rails with those mounting holes within two to three inches again of the rail itself. We're gonna take the mid clamp, the part that doesn't have the sleeve, we're actually gonna set it up here. This is gonna be between two solar panels and you're gonna end up having a number of these if you have a longer array. These'll sit in place okay, they're just a little T bolt on the end so again, they're gonna go into the channel, turn, and lock in place. The end clamp, again with that sleeve, is what's going on the end of the panel. That sleeve makes sure that nothing tightens down too much that it won't be able to hold this panel in place. Once we have these up here, we are going to go ahead and tighten down our end clamps. Not all the way, but just enough to assist in holding the panel. And again, you do wanna make sure you have positive pressure on that T bolt to make sure it doesn't spin within the channel. Same thing on the bottom, and of course, now we wanna make sure again our measurements are really similar with the rails from the edge of the roof so that it all lines up aesthetically. Now we've completed the installation of our IronRidge roof mount racking system. If you have any questions while going through this process, feel free to give us a call or stop by our website at wholesalesolar.com. My name's Jeremy Allen, I'll see you next time. ...


No hay comentarios